 Login as
By Arun Mani – Web Analytics Master
Google Analytics has some nifty features that aren’t readily apparent to the average user. I will describe how an audience can be created in Google Analytics and then be used in Google AdWords for remarketing purposes. Remarketing involves targeting previous users to your website with specific display ads or search ads based on their browsing behavior on your website.
The first step in remarketing is to create an audience. An audience can be created directly in Google AdWords. But there is a powerful and easy way to do it in Google Analytics. Once the audience is created in Google Analytics it can be linked to your Google AdWords account.
If you are using Google Analytics advertising features, you are required to notify your visitors by disclosing the following information in your privacy policy:
- The Google Analytics Advertising Features you’ve implemented.
- How you and third-party vendors use first-party cookies (such as the Google Analytics cookie) or other first-party identifiers, and third-party cookies (such as Google advertising cookies) or other third-party identifiers together.
- How visitors can opt-out of the Google Analytics Advertising Features you use, including through Ads Settings, Ad Settings for mobile apps, or any other available means (for example, the NAI’s consumer opt-out).
In addition, for the European union, you must comply with the European Union User consent policy:https://www.google.com/about/company/user-consent-policy.html
Make sure you’ve first complied with the privacy policy requirements of Google before you start using the advertising features of Google Analytics.
There are two basic methods to enable remarketing features in Google Analytics:
1. Modify your property settings 2. Modify your tracking code
First, you can modify your property settings. This method only applies to web properties. Modifying your property settings causes traffic to ALL your pages to be subject to data collection. If you want to implement these features for only portions of your website, then you need to modify the tracking code for each relevant page.
To update your property settings:
- Sign into Analytics
- Select the Admin tab and navigate to the account and property for which you want to enable these features.
- In the Property column, click Tracking Info, then click Data Collection.
Under Data Collection for Advertising Features:
To enable Remarketing, set Remarketing and Advertising Reporting Features to ON.
Modifying the property settings is the ONLY way to enable remarketing for Search Ads.
Now onto the second method, enabling remarketing(display) by modifying your tracking code. Tracking code is the code you insert into your webpages to enable Google Analytics tracking. To enable remarketing insert the following line ga(‘require’, ‘displayfeatures’); between the ‘create’ and ‘send’ commands of the tracking code:
<script>
(function(i,s,o,g,r,a,m){i[‘GoogleAnalyticsObject’]=r;i[r]=i[r]||function(){
(i[r].q=i[r].q||[]).push(arguments)},i[r].l=1*new Date();a=s.createElement(o),
m=s.getElementsByTagName(o)[0];a.async=1;a.src=g;m.parentNode.insertBefore(a,m)
})(window,document,’script’,’//www.google-analytics.com/analytics.js’,’ga’);
ga(‘create’, ‘UA-XXXXXX-XX’, ‘example.com’);
ga(‘require’, ‘displayfeatures’);
ga(‘send’, ‘pageview’);
</script>.
Enabling remarketing for your mobile app involves modifying your analytics tracking code that you have included in your app code. The example for Android is shown below:To enable these features for Android, modify your Analytics tracking code to collect the advertising id. Call the enableAdvertisingIdCollection method on the tracker for which you want to enable these features. For example:
// Get tracker.
Tracker t = ((AnalyticsSampleApp) getActivity().getApplication()).getTracker(
TrackerName.APP_TRACKER);
// Enable Display Features.
t.enableAdvertisingIdCollection(true);
How do you create and edit a remarketing audience in Google Analytics? The steps are as follows:
- Sign into your Google Analytics Account.
- Select the admin tab and navigate to the account and property for which you wish to create an audience.
- In the property column, click audience definitions, then click audiences
- Click + New Audience
- In the view menu, select a view that includes the users to whom you want to show ads via your remarketing campaign.
- In the destination menu, select the advertising account in which you want to use the remarketing audience. This could be your AdWords account. For example:

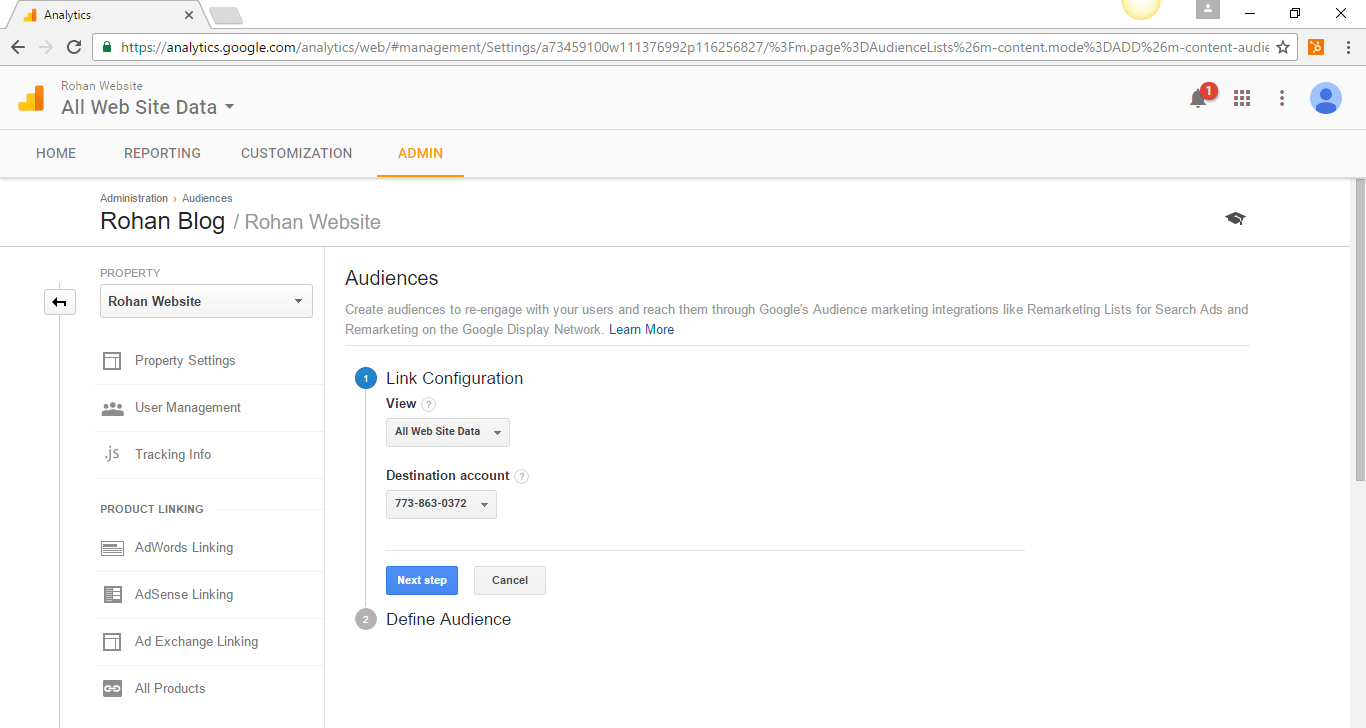
Click Next Step. On clicking Next Step, the following screen is shown:
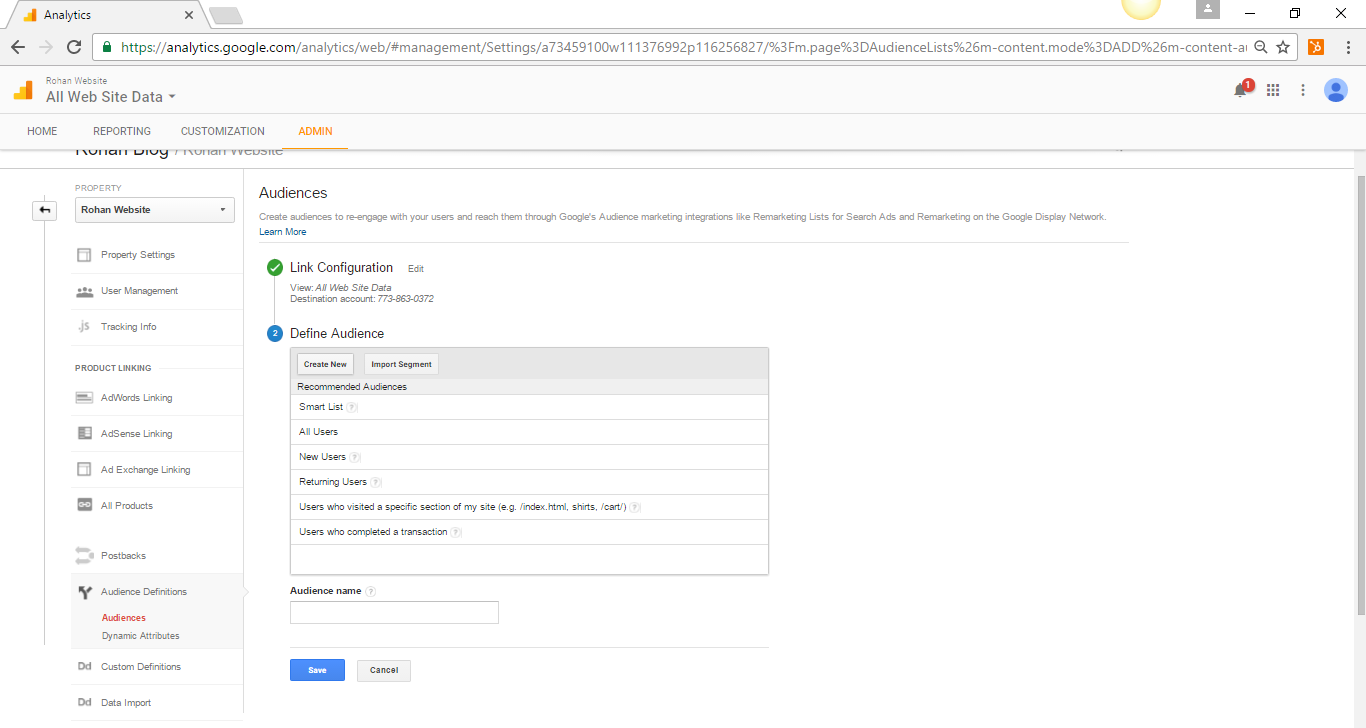
Pick one of the choices (the choices will be explained later). On picking a choice the screen will look as follows:

The option ‘Returning Visitor’ was picked. The number of users of the last 7 days is shown. The membership duration value can be from 1 to 540. It is the number of days, in this specific case, Returning Visitors, who are eligible to be served remarketing ads. Eligibility shows the destinations to which you can publish this audience.
If your audience includes Gender, Age or any other interest dimension, then you can use this audience only with AdWords display.
Enter a name for your audience and then click save.
The default types of audience from the drop down list are as follows:
- Smart List: Google Manages the audience for you. This is an audience generated by Analytics to maximize your conversions.
- All users: All users to your website that have the necessary advertising cookies or mobile advertising IDs.
- New users: Users with only one session on your site or app
- Returning users: User who have carried out more than one session on your site or app
- Users who have visited a specific section of your app or site: Click the edit button, enter the URL of a page or directory on your site, or a screen of your app.This option uses the contains match type, and matches any URL that contains the string you enter.
- Users who completed a transaction: This is configured to include any user with more than zero transactions.
In addition, to using the default options for audience definitions, you can create your own audience with the audience builder tool. This tool is accessible by clicking the ‘Create New’ button on the following screen:
On clicking the Create New button the following screen will pop open:
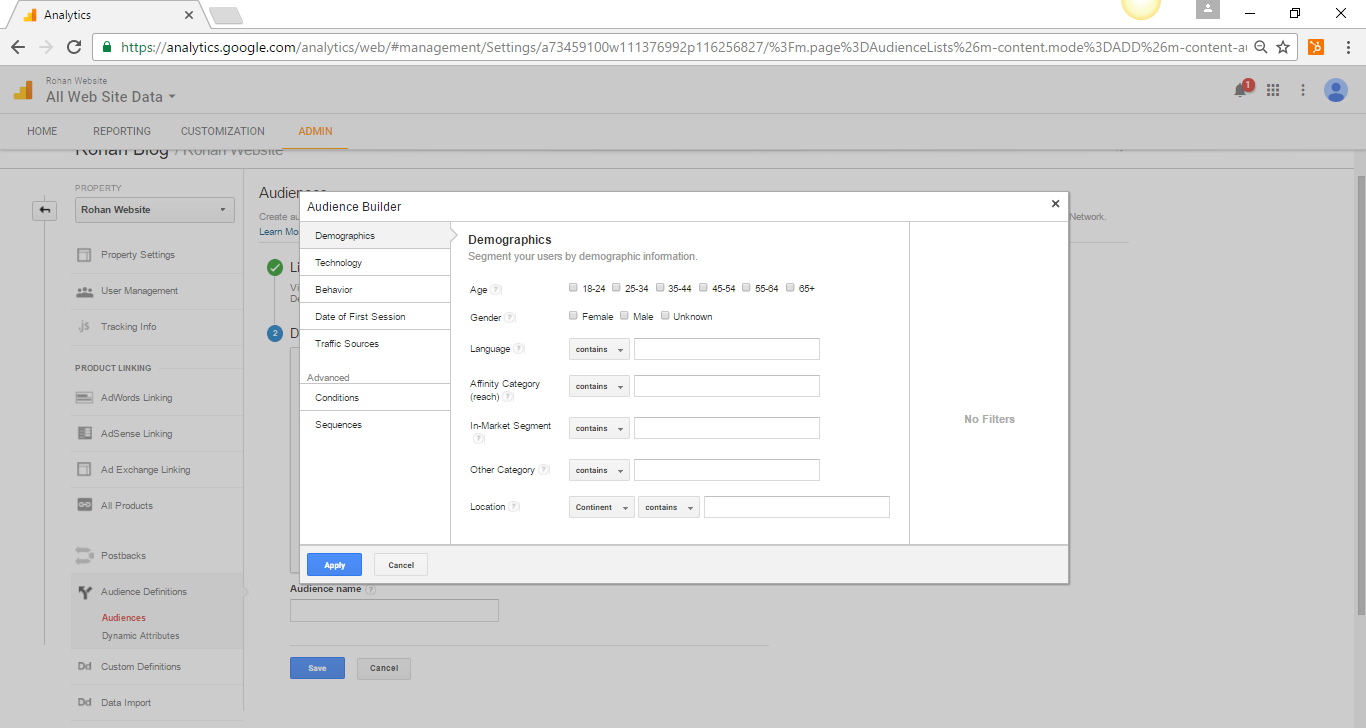
Audience builder can help you create your own defined audience such as ‘Users who abandoned items in their shopping carts’, ‘Users who viewed any page in a directory’, etc.
Once you create your audience/audiences you should see your list of audiences in Admin -> Property -> Audience Definitions:
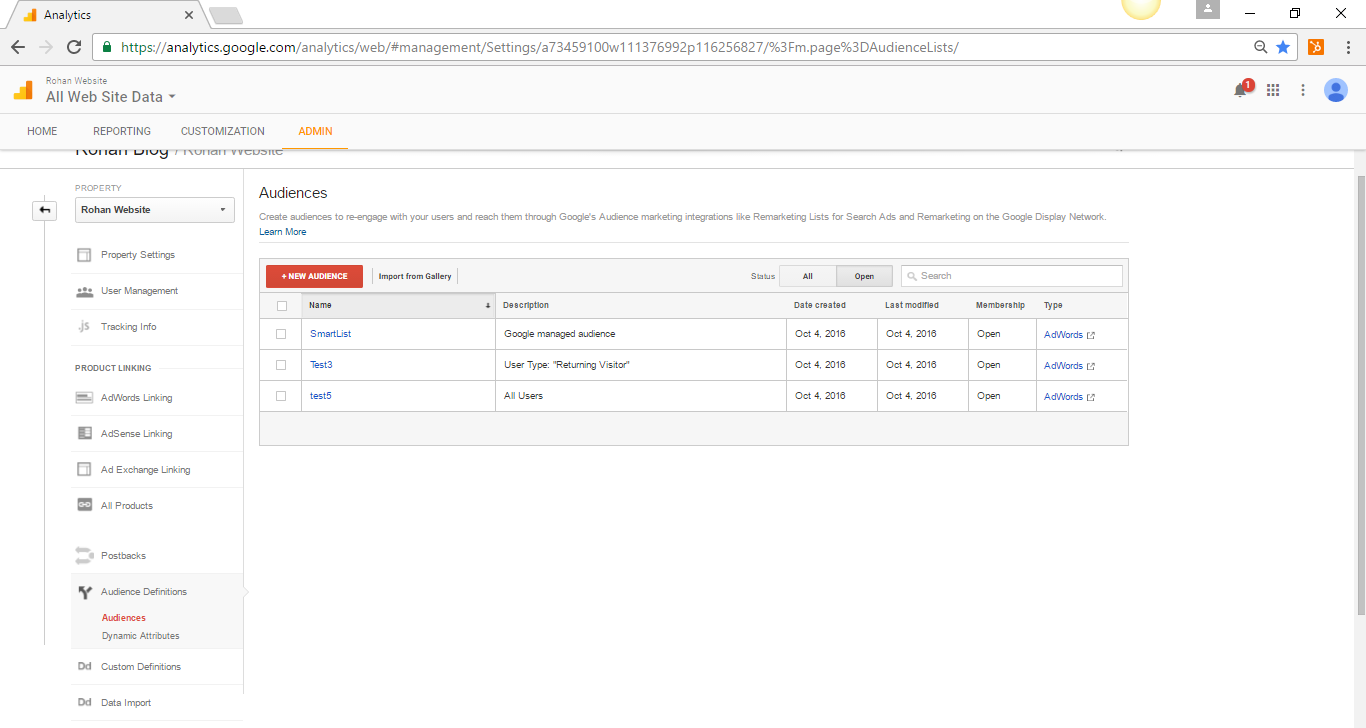
The last column in the table gives you a link to AdWords. Click on the link to go to AdWords. In AdWords you can create a remarketing campaign to target the particular audience created/defined in Google Analytics.
We now have a starting point remarketing list. In AdWords, you need to obtain a remarketing tag, and add the tag to every page in your site. This code tells AdWords to add every site visitor to the remarketing list.
Now go forth and create your own remarketing list in Google Analytics.


;>/img/banner/partner $url=>$index; .png)